Being a proud owner of a Coleman SaluSpa AirJet Hot Tub comes with its own fair share of maintenance tasks. One such task is dealing with annoying leaks that might occur over time due to wear and tear or some accidental damage. These leaks, if ignored, could lead to extensive damage and a less than enjoyable spa session. Hence, it’s crucial to know how to find these leaks and to repair them on our own. This piece will guide you through the identification of potential leakage spots, preparation you’ll need for a successful repair, and the actual repair process, ensuring you can comfortably maintain your Coleman SaluSpa hot tub operational for years to come.
Identification of the Leak
So, you’ve become a hot tub aficionado and you chose SaluSpa AirJet as your go-to soaking spot. Great choice! Unfortunately, situations arise where a leak starts threatening to steal away your relaxation time. But fear not, fellow hot tub friend! This quick and handy guide will outline how to detect the source of the leak in your SaluSpa AirJet Hot Tub so you can go back to enjoying those beautiful bubble massages.
First and foremost, safety should be your top priority. Ensure your hot tub is powered off and disconnected from any electrical source before inspecting for leaks.
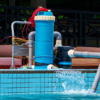
The next step is a preliminary visual inspection. Leaks frequently occur near joinings and fittings—pipe connections, valves, the drain and, of course, the pump unit itself. Look out for pooling water under or around the tub. If you see any, try to trace the trail upwards to its source. If you can’t visually locate the leak, don’t worry. We have a trick up our sleeve: the good old soap method!
Ever tried to find a hole in a bicycle tire? This is pretty much the same concept—we are creating a simple homemade leak detector. Mix a solution of dish soap and water—roughly one part soap to five parts water should do the trick. Apply this soapy water over the seams and any suspect areas on the hot tub‘s surface. Should there be a leak, the escaping air will cause the soapy water to bubble, pointing you directly to the source of the leaks. Remember to check each section of the tub thoroughly, including the bottom!
Now onto the inflatable lid. Tricky leaks that appear small often occur in the inflatable top. The soap method works well here too—methodically apply your soapy solution and keep an eye out for those telltale bubbles. Just be sure to clean off any soap residue once you’ve finished, to maintain the integrity of the material.
If your hot tub has an air bladder, remember to check it as well. Drain all water from the tub and inflate the bladder. Using the soap trick once more, apply the soapy solution to the bladder, looking for bubbles to catch the culprit.
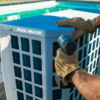
Last,y, let’s talk about valves and pipe connections. These can particularly be pesky areas where leaks sneak in. Check them by feeling around for dampness. If detected, try tightening the connection using a wrench. If the problem persists, consider using pipe joint compound or plumber’s tape for a more watertight seal.
There you have it! Each leak detection method requires patience and a keen eye. Hopefully, this guide helps bring that soothing, bubbly jacuzzi session back into your routine. Enjoy those relaxed evenings, morning soaks, or weekend chill-outs with peace of mind knowing you’ve got the skills to maintain your SaluSpa. Happy hot tubing!

Preparation for Hot Tub Repair
Title: Getting Started with Leak Repair for Your Coleman SaluSpa AirJet Hot Tub
Once meticulous leak detection steps have been taken, moving forward with the repair process becomes a task that demands your utmost attention and precision. The first step is to ensure that you have the right tools and materials for the job. Below are the essentials:
Materials Needed:
- Repair Kit: Most hot tub models, including the Coleman SaluSpa, come equipped with a repair patch kit. If not, these can be easily purchased from a nearby home improvement store or an online retailer.
- Hot Tub-Specific Adhesive: This specially-formulated adhesive is designed to withstand water exposure and high temperatures, making it perfect for securing patches to your hot tub.
- Rubber Gloves: Although generally non-hazardous, it’s often advisable to wear these while handling adhesive to keep your hands cleaner and to prevent potential allergic reactions.
- Bucket and Sponge: These are key for cleaning and drying the area of the suspected leak prior to applying the repair patch.
Now that you are ready with the necessary materials, here’s a step-by-step guide to start the leak repair process of your Coleman SaluSpa AirJet Hot Tub:
Step 1: Patch Preparation
First, you’ll need to cut a patch from your repair kit. Ensure the patch is large enough to cover the leak completely, ideally extending a couple of inches beyond the leak in every direction.
Step 2: Area Preparation
Using the bucket and sponge, clean the leak area thoroughly to ensure stable adhesion. After cleaning, allow the area to dry completely. Any moisture left behind may interfere with the adhesive.
Step 3: Applying Adhesive
Next, apply a generous amount of hot tub-specific adhesive to the side that will be in contact with the leak area. It’s essential that the full area of the patch is covered to create a waterproof seal.
Step 4: Patch Application
Apply the patch, adhesive side down, onto the leak area. Press firmly and gradually to ensure it sticks properly without causing bubbles or creases. Some patience is necessary here to avoid unintended mishaps.
Step 5: Drying the Patch
Allow the patch to dry completely. Depending on the particular brand of adhesive used, drying times may vary, so be sure to follow the specific instructions provided.
Step 6: Testing
Once dry, fill the hot tub to the appropriate level and observe the repaired area for any signs of continued leakage.
Remember, during the repair process, persistence is key. It might take a couple of attempts to properly seal a leak – but don’t get disheartened. With every try, you’re one step nearer to regaining uninterrupted enjoyment of your Coleman SaluSpa AirJet Hot Tub. Safe repairing!

Repairing the Leak
Have a Leaky SaluSpa AirJet Hot Tub? Here’s a Handy Guide
Being a passionate hot tub enthusiast, make sure you’ve ticked all the critical preparatory steps in fixing the SaluSpa AirJet Hot Tub’s leak. You’ve powered off the tub, checked crucial areas, and have tightened loose valves. You’ve even been patient, waiting and keenly observing. Now, onto the next essential stage—repairing that stubborn leak!
A quick heads up: you’ll need a puncture repair kit to start. It’s easy to get hold of one from your local hardware store, or better yet, online. It should include a strong adhesive and durable patches to plug the leak.
First up, mark the leaking area with a waterproof marker. This small step will ensure a targeted approach and lesser wastage of resources. Remember—meticulousness is the key to an effective repair job!
Thereafter, thoroughly clean the marked area by wiping it down with a mild detergent-free cleaning solution. This will remove any residue that might have built up and create the best possible surface for the adhesive to grip onto. Rinse and pat dry with a clean towel afterward to ensure no water interferes with the patching process.
Next, apply a thin layer of the adhesive provided in your repair kit onto the cleaned, dry surface in and around the marked area. Carefully spread it evenly in a circular motion, similar to how you would apply a piece of paint on a canvas, increasing your circular strokes’ width twice as big as the patch size.
Now comes the crucial step—applying the patch. Cut a round patch from the repair kit, big enough to overlap the leak by at least half an inch all around. Place the patch over the adhesive-filled area, pressing firmly from the center going outward to eliminate air bubbles and ensure solid adherence.
Post-application, you’ll want to keep everything dry to let the adhesive create a firm, watertight bond with the patch and the tub material. A waiting period of 24 to 48 hours is usually recommended, but it’s best to rely on the instructions provided with the specific repair kit.
Once the recommended drying period has lapsed, it’s time to test your handiwork. Reinflate the hot tub and fill it up with water—the same amount that was in the tub when you first detected the leak. Observe the patched area for any signs of new leaks or dampness. If it holds fast and dry, congratulations, job well done!
Remember, the aim here is not only fixing that sneaky leak but also creating a reliable, long-lasting repair. So, for every hot tub aficionado out there, keep this guide in your back pocket. After all, a well-maintained tub equals uninterrupted relaxation and enjoyment. Happy hot tubbing!

Caring for your Coleman SaluSpa AirJet Hot Tub is far more than just keeping it clean and running. It is about understanding how each component functions and being able to troubleshoot and fix issues like leaks. By mastering the art of leak detection, preparing the required supplies and executing a successful repair, you not only gain practical skills, but you enhance the lifespan of your spa. The satisfaction of being able to solve such problems independently adds to your hot tub experience, allowing you to enjoy everything your Coleman SaluSpa AirJet Hot Tub has to offer.